How to Sell on Amazon: 5 Simple Steps
- Sign up for an Amazon seller account. Choose a seller category, create your Amazon seller account, and set up your seller profile.
- List your products. List products already on Amazon, or list new products.
- Manage your inventory. Keep inventory levels up to outcompete other sellers, and consider sponsoring certain products based on demand.
- Fulfill, and ship orders. Decide between seller self-shipping, or fulfillment by Amazon.
- Receive your earnings. Amazon deducts fees from your profit and sends the balance to your bank account.
If you’re a small business owner offering a unique product, we’re willing to bet that you’ve considered selling on Amazon. Amazon is a tried-and-true retail powerhouse, and third-party sellers are driving most of that growth. By the end of 2019, sales from the Amazon marketplace are expected to surpass over 70% of the company’s business.
For one thing, Amazon offer sellers a huge audience of potential customers. Amazon’s generous range of business management and distribution tools also makes it easy for sellers to scale far beyond what they could do alone. And you don’t only need to sell material products to leverage Amazon’s incredible marketplace: Amazon Home Services allows B2C service providers to connect with clients in their areas.
If you’ve been curious about using the Amazon marketplace to grow your small business, read our comprehensive, step-by-step guide about selling on Amazon successfully. We’ve added tips on best practices, too, so you can be sure you’re getting the most out of the Amazon marketplace.
Selling on Amazon: A Step-by-Step Guide
Although there have been entire books written about how to sell on Amazon, selling your products on the marketplace can be a pretty fast, easy process.
Successful Amazon Sellers have included nationally recognizable brand names, individuals sellers distributing thousands of units straight from their living rooms, and everything in between. It all comes down to how you choose to leverage the marketplace, and Amazon’s various services, to fit your small business’s needs.
Regardless of their size, every new Amazon seller gets started with the same five steps. Here are the details of what you need to do to start selling on Amazon.
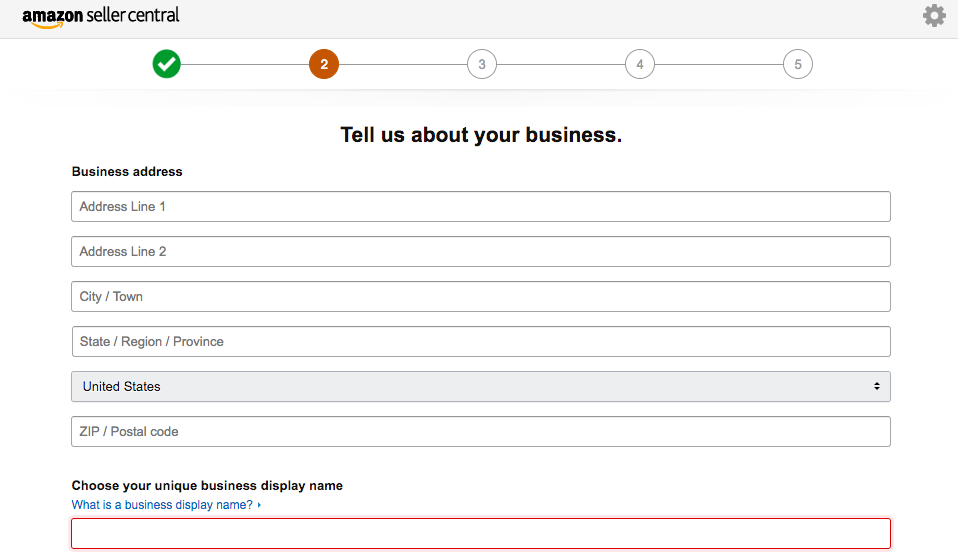
Photo credit: Sellercentral.amazon.com
Step 1: Sign Up for an Amazon Seller Account
In order to set up your Amazon seller account, you’ll need to choose a seller category, provide some information about your business, and understand Amazon’s seller policies.
Choose a Seller Category
When you sign up to sell on Amazon, you’ll choose one of three different selling categories, depending on the scale of your business:
- Amazon Individual Seller: If you own a very small business and plan to sell fewer than 40 items per month, you can sign up as an Amazon Individual Seller. This’ll cost you just $0.99 per sale, plus a few other transaction fees.
- Amazon Pro Seller: If you plan to sell more than 40 individual items per month, you’ll need to sign up for a Pro account. Amazon will charge a subscription fee of $39.99 per month, plus some transaction fees on each sale.
- Amazon Vendor: If you manufacture products yourself, you can sell these goods as a wholesaler to Amazon. They will handle product listings, fulfillment, and shipping, and when they run out of stock, they will order more from you.
Be aware that certain products require approval to sell—and, if approved, only sellers with Pro accounts are eligible to sell those products. Before you choose which type of account to sign up for, check out Amazon’s comprehensive list of products requiring special approval to see whether you’ll need to get the go-ahead before becoming a seller.
Create Your Amazon Seller Account
After you’ve chosen which category you’ll sell under, you’re ready to set up your Amazon Seller Account. To complete your account setup, Amazon will request:
- Your Business Name: This is the name that will be visible to customers in the Amazon Marketplace.
- Your Legal Name and Address: This information is stored in your account for Amazon’s reference. If you’re a registered business entity, or have a fictitious business name/dba, use the exact name and address under which you’re registered.
- Contact Information: Amazon will use your contact information to send you order notifications, Guarantee Claim notifications, and service and technical updates. Customers will use your customer contact information to reach out with questions about your orders. Contacts for Amazon and customers can be the same or separate.
- Where Products “Ship From”: Although your Ship From location doesn’t change the shipping time or cost for buyers, some customers will use this information to make a buying decision between similar listings.
- Bank Account Information: Amazon delivers payments for products sold every 14 days directly to your business bank account.
- Shipping Options: Select which worldwide regions you’re willing to ship to, and indicate whether you’ll offer expedited shipping.
Set Up Your Seller Profile
Once your account is active, the next step in the Amazon selling process is to complete your public seller profile. Think of the Amazon seller profile as your Amazon-based social network profile for your business: This is where Amazon customers will get to know your company, view your shipping and return policies, review customer feedback, and more.
Here are the main sections you’ll want to complete in your Seller Profile right away:
- “About Seller” Section: This is where you’ll introduce buyers to your small business. Let them know who you are, tell the story of how you started your business, share your company philosophy, and add any other information that may help the buyer establish an emotional connection to you as a seller.
- Your Seller Logo: Customers will see your logo on your At a Glance page, on your storefront, and on the Offer Listing Page. Your logo must be 120 x 30 pixels in size, and the image can’t contain a URL or any reference to your own website.
- Return and Refund Policies: Provide instructions for how customers should return items, include the address where the merchandise should be returned to, and inform customers about the estimated time to process a refund. Keep in mind, though, that Amazon policy requires sellers to allow returns for a minimum of 30 days.
Once you provide all this information, you’ll be able to access your Seller Central Dashboard and can start listing products for sale on Amazon.
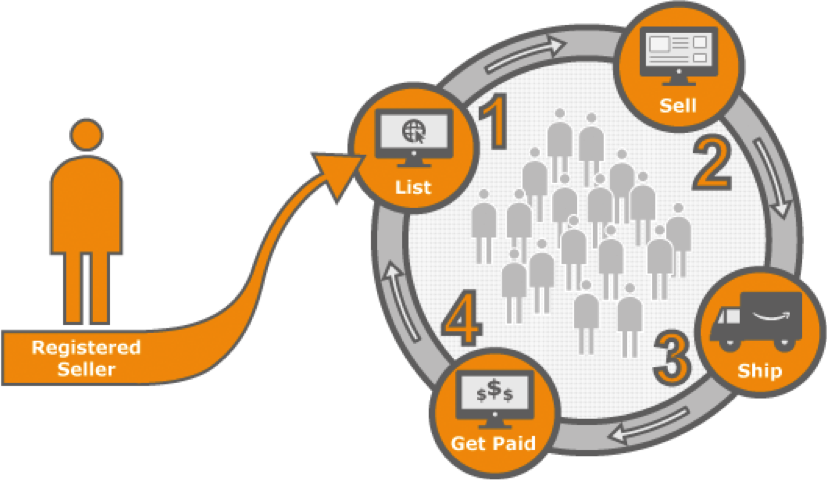
Photo credit: Services.amazon.com
Step 2: List Your Products
There is a learning curve to selling on Amazon successfully, but once you get the hang of it, selling on Amazon can be simple and intuitive. Once you set up your seller account, you get the ball rolling by listing your products for sale in the Amazon marketplace.
If you’re an individual seller, you’ll list your products on the Amazon Marketplace one at a time. And if you’re a professional seller, you can list your products in large batches. Certain types of products, like clothing, support variations of size or color under a single listing.
The products you sell on Amazon will fall into one of two categories: Products already listed in the Amazon Marketplace, and new products of which you will be the first or only seller.
Listing Products Already on Amazon
If the product you’re listing is already on Amazon, you can use the stock images and descriptions available on the site. You just have to indicate how many of the products you have to sell, describe the condition of the products, and select your available shipping options.
When other sellers offering the same product run out of stock, Amazon will show your listing at the top. Remember also to try to differentiate yourself from other sellers who have listed the same product. You can offer free shipping, faster shipping, or lower prices to stand out from other sellers.
You can find “List a New Product” in your seller dashboard. Search through the product catalog to see if Amazon already stocks the product. You’ll be asked to provide price, quantity, and shipping information. You can add one product at a time. But if you’re listing more than 50 products that are already in the Amazon catalog, you’ll use the Excel-formatted Listings Loader to fill in and upload the UPC/EAN codes for your listed products.
Listing Products Not Yet on Amazon
Do you design or manufacture a brand-new product that isn’t yet sold on Amazon? The great news is that you’ll definitely face less competition. The not-so-great news? Listing new products requires an Amazon Pro account and involves a few extra steps.
In order to list a new product on Amazon, you’ll need to provide:
- The UPC/EAN Number: A unique 12- or 13-digit bar code used to track products. Multiple listings from various sellers of the same product will have a single UPC/EAN number, and only one product detail listing will be created to match that unique number.
- The SKU: A unique number that you create to track each of your listings.
- The Product Title: This should describe the product as concisely as possible.
- Product Description and Bullet Points: Use the bullet points as quick descriptive text to catch the buyer’s interest. You can provide a more thorough overview of your product in the product description.
- Product Images: High quality images are essential to selling on Amazon successfully. Amazon requires that images are at least 500 x 500 pixels on a pure white background without text or watermarks, and the product should take up at least 80% of the image area. For best results, use well-lit images of at least 1,000 x 1,000 pixels in size.
- Search Terms: For each new product that you list, Amazon gives you five fields of 50 characters each in which to list search terms.
Your product description and images are your time to shine! Make sure the description is search engine-optimized and that you include high-quality product images. Once you’ve gathered your product information, you have two options for uploading new product listings:
- If you’re seller 50 or fewer products, you can use the Seller Central Add a Product tool.
- To add multiple products not yet listed in the Amazon catalog, you’ll:
- Go to Seller Central
- Download the Inventory File Excel template that corresponds to your primary product category
- Fill in and upload details for all of your products from one central spreadsheet.
You can also link some ecommerce apps, such as Shopify and BigCommerce, with your Amazon Seller account to automatically pick up product listings.
Listings may be available to customers immediately after your upload is complete—but Amazon may take up to 24 hours to process your upload. If you don’t immediately see your new listing on the offer listing page, be patient and check back the next day for updates. If it still seems to be missing, contact Amazon through the Seller Portal, or use the FAQ to troubleshoot any upload errors.

Photo credit: Vendio.com
Step 3: Manage Your Inventory
As soon as you upload your listings and set them live on the Amazon marketplace, you can use the Seller Central website to manage all aspects of your selling account: check for new orders, update your inventory, monitor your performance metrics, and much more.
Properly managing your inventory is one of the biggest keys to success as an Amazon seller. As a buyer, remember when you click on a product you really want or need, only to find that it’s out of stock. That’s a huge missed opportunity for the seller.
To prevent that from happening, there are a couple different tools you can use. The simplest for small sellers is the Seller Central dashboard. From there, you can manually adjust inventory levels for all of your products. If you’re a Pro seller, you can also adjust inventory levels with a bulk Excel upload. If you use an inventory app that integrates with Amazon, such as Vendio or SellerEngine, you can use that to update your Amazon inventory.
Sometimes, sellers choose to sponsor their merchandise with ads if a particular product is not moving fast enough, or simply to increase demand. Sponsored ads are keyword targeted ads that will move your listings above other search results—marked as sponsored—when a customer types in a specific search term. The cost is per click, and you can set your own budget and track performance.

Photo credit: Services.amazon.com
Step 4: Fulfill, and Sell Your Products
Listing products for sale in the Amazon marketplace and managing your inventory are the hardest parts of selling on Amazon. Once a customer places an order, the next step is to get that product into their hands.
Amazon offers two options for product fulfillment and shipment:
- Fulfillment by Merchant (FBM): You, as the Amazon seller, are responsible for maintaining inventory, packaging, labeling, and shipping products to individual customers.
- Fulfillment by Amazon (FBA): Amazon stores your products in their fulfillment centers, and they’ll handles packaging and shipping products to customers.
Fulfillment by Merchant (FBM)
Self-shipping is typically a good option for small sellers and those with smaller margins. You can opt to charge for shipping or offer free shipping. The biggest advantage of FBM is that you can keep everything in-house and not lose more of your profits to Amazon fees.
The disadvantages are that it’s harder to qualify as an Amazon Prime shipper when you do FBM, so you can could lose out on customers with Prime accounts. The other downside is that it’s more difficult to win the buy box (more on that below) when you choose FBM.
Fulfillment by Amazon (FBA)
If the nitty-gritty of processing and shipping orders yourself feels overwhelming, go for the Fulfillment by Amazon (FBA) shipping method. Through FBA, you can use Amazon’s world-class fulfillment centers, customer support, and other operational tools to scale your business faster than you ever could on your own.
If you work with FBA, you’ll store your inventory in Amazon’s fulfillment centers around the world. When a customer places an order, Amazon handles packaging and shipping the product to the customer.
Here are some other advantages to using FBA:
- Automatic Prime Eligibility: When you manage your products through Amazon FBA, your entire inventory automatically becomes Prime eligible—a benefit that regularly leads to customers choosing your listing first. With FBM, you must have high volume and outstanding sales metrics to qualify as a Prime seller.
- Free Super Saver Eligibility: All products that FBA manages are eligible for Free Super Saver Shipping on orders over $25. These listings benefit from better placement on the Amazon site than seller-fulfilled listings.
- A Single Inventory Pool: You can use Amazon FBA to fulfill orders not just from the Amazon Marketplace, but from your own ecommerce site or other third-party sites, as well. As a result, you’ll have a seamless sales and shipping experience, regardless of where you’re selling your product online.
- Win More Buy Box Listings – When you choose FBA, you significantly increase your chances of winning the buy box for a particular product.
- Higher Product Rankings – Amazon gives preference to FBA sellers when ranking products.
Beyond these advantages, the best part of using FBA is that it’s incredibly easy. Instead of handling the logistics of monitoring and fulfilling orders, tracking shipments, and handling customer service issues yourself, all you have to do is send your inventory to Amazon and let them handle the rest.
How FBA Works
If you decide that using Fulfillment by Amazon to manage your Amazon seller account is the best choice for your business, follow these steps to get started.
- Upload Your Product List: To get started with FBA, upload your product list onto Seller Central following the same steps you would use for a seller-shipped product. Then, arrange to ship your full or partial inventory directly to Amazon, benefiting from Amazon’s reduced shipping rates.
- Store and Manage Your Inventory Through Amazon: Amazon stores and manages your products within one or several of their 75+ fulfillment centers around the world. You still own the inventory, of course. You’ll also pay a storage fee for your items until they’re sold.
- Pay-as-You-Go: FBA has no minimum unit count, so you only pay for the number and weight of units you actually store and ship to customers. The only monthly fee is the monthly inventory storage fee for the convenience of using Amazon’s fulfillment centers to store your products.
- Picked, Packed, and Shipped by Amazon: As soon as you receive an order, Amazon will package and ship your product directly to the customer.
- Seamless Management of Payments: Once Amazon ships the order, Amazon collects payment from the customer, deducts their fulfillment fee as a percentage of the total sale based on the weight and number of items, and deposits payments directly into your bank account every 14 days.
- Customer Service by Amazon: If you use FBA, Amazon serves as the direct customer service contact.
FBA Pricing
When using FBA, you’ll be responsible for two different types of FBA fees:
- Amazon Fulfillment Fees: Amazon charges fees, based on weight and size of your products, to pick, pack, and ship your products, and handle customer service inquiries. This fee can be as low as $2.41 per product for smaller items but can increase significantly for larger or oversize items.
- Monthly Storage Inventory Fees: If you use Amazon’s warehouses to store your inventory, you’ll be charged a monthly fee based on the amount of storage space you’re using.
There are additional, smaller FBA fees noted in the next step. Don’t forget that you’ll also have to pay separate fees that all Amazon sellers are charged, whether or not they use FBA. We’ll cover those in more detail next. For instance, there’s the referral fee that’s charged per product, usually no higher than 15% of the list price. There’s also the monthly subscription fee for Pro sellers.
Step 5: Receive Your Earnings
Amazon is a great way to expand your business’s reach, but there’s obviously a cost to selling on Amazon. Amazon will deduct all applicable fees from your sales proceeds every two weeks. They’ll deposit the balance into your bank account every two weeks, and send you an email notification every time you’ve receive a new payment.
Here is a list of Amazon seller fees that will be deducted from your sales:
- Monthly Seller Fee – These are the fees that you pay to Amazon for the privilege of access to their marketplace. Pro sellers pay $39.99 per month, and individual sellers pay $0.99 per sale.
- Referral Fees – These vary by product category and size, but you generally won’t have to pay more than 15% of your product’s sale price as a referral fee.
- Returns Processing Fees – Amazon charges sellers a returns processing fee in certain product categories.
- Stock Removal Fees – This is a fee that Amazon charges FBA sellers who want Amazon to send back or dispose of their unsold stock.
- Inventory Placement Fees – This is another fee levied on FBA sellers who want more control over which Amazon fulfillment centers their inventory ships from.
- FBA Export Fees – Sometimes, Amazon charges export fees for shipping products internationally.
- Pick and Pack Fees: Amazon charges fees, based on weight and size of your products, to pick, pack, and ship your products, and handle customer service inquiries. This fee can be as low as $2.41 per product for smaller items but can increase significantly for larger or oversize items.
- Monthly Storage Inventory Fees: If you use Amazon’s warehouses to store your inventory, you’ll be charged a monthly fee based on the amount of storage space you’re using.
While this list of fees might seem overwhelming, a large number of independent sellers manage to make a nice profit selling on Amazon. The key to success is managing your inventory correctly, high-quality products listings and images, and fair pricing for your products.

Tips for Selling Products on Amazon Successfully
There are a few steps involved in selling your products on Amazon, and some are a little more complicated than others. But if you complete all these steps, you’ll be able to benefit from Amazon’s incredible advantages and quickly scale your business.
How exactly can your small business best benefit from Amazon’s selling platform? Follow these tips to make your Amazon product listings stand out from the crowd, and win tons of sales over your competition.
1. Check for New Orders Daily
Since customer service is a key metric by which Amazon determines your success as a seller, it’s crucial to know when a new customer has purchased your product. That way, you can promptly fill and ship every order you receive.
Amazon sends you an email notification when you have a sale, but those emails aren’t always reliable. Get in the habit of checking the Seller Central portal every day, so you can really stay on top of new orders or notifications from your customers.
2. Confirm When You Ship
Product sellers should always confirm on the Seller Central portal when an order has shipped. Amazon only charges your customer’s credit card after the shipment is confirmed. So, in addition to good customer service, this step is important to getting yourself paid quickly.
Remember that you’re responsible for confirming shipment within the time frame that you specified in your shipping settings. To confirm that Amazon has shipped an order, go to the Orders tab, then select the Confirm Shipment button for the order in question.
3. Check Your Inventory Regularly
Keep track of how much inventory you have in stock at all times. Realizing that you’re unexpectedly out of stock and can’t fulfill an order is a recipe for negative customer feedback—which can have a dramatic impact on your future sales.
4. Keep Pricing Information Up-to-Date
Shoppers are most likely to choose the lowest-priced deals (as long as they are listed near the top of the results page). So if you hold a sale or lower your prices, make sure to update your product listings to reflect those changes.
5. Respond to Customers Promptly
One of the benefits of partnering with Amazon is your association with the brand’s top-notch reliability and customer service. As a new seller, you start with the benefit of Amazon’s built-in credibility. But it’s your responsibility to maintain that credibility by being highly reliable and responsive to customers.
If an order is delayed, for instance, reach out to the customer to give them a heads up. Or if a customer contacts you because they didn’t receive a shipment, or the product was damaged, respond immediately, and take steps to remedy the situation.
6. Build a Five-Star Feedback Rating
Cultivating a strong customer feedback rating is key to your selling experience on Amazon—both for improving buyer perception of your product listings, and for improving the placement of your products on the offer listing page.
Here are a few things you can do to help build a strong feedback rating:
- Describe products accurately, in as much detail as possible
- Ship products to customers as promptly as possible
- Reach out to customers proactively with information about delays or changes to their order
- Respond to customers’ questions within 24 hours
- Solicit positive customer feedback on your product packing slips
7. Win the Buy Box on Amazon
If you’ve ever shopped on Amazon, you’ll know that the platform allows multiple sellers to offer the same product. All the sellers listing the same product may compete to win the “Buy Box” for that product. The Buy Box on a product’s page is where customers add items to their shopping carts.
By “winning” the Buy Box, one seller will become the default listing for any given product that multiple sellers offer—so if you win the Buy Box, you’ll likely see an increase in sales.
Amazon doesn’t disclose the specific targets required for sellers to win the Buy Box. But to increase your chances of winning that coveted spot, focus on optimizing your listings in these four areas:
- Pricing: Make sure you’re pricing your products competitively. Buy Box listings most frequently display the lowest available “all in” prices—that is, the total amount the customer will pay, including shipping costs.
- Availability: Keep your most popular products consistently in stock, and make sure you’re regularly updating your inventory numbers in the Seller Central portal.
- Fulfillment: Update your shipping settings in Seller Central to offer multiple shipping speeds and options—and, if at all possible, offer free shipping.
- Customer Service: Keep an eye on your customer feedback, and use the Account Health page in the Performance section of seller central to monitor your customer metrics.
Improving your listing placement on the Amazon Offer Listing Page requires trial, error, and a little bit of time. Work to provide a top-notch experience for your customers, and improve your logistical processes. Over time, those efforts will translate into more Buy Box placements for your business and more customers.

How to Sell Services on Amazon
By now, most retailers are well aware of Amazon’s impact on the product marketplace—and they know how selling their products on Amazon can benefit their businesses.
But if you’re a service professional who provides any type of B2C service, you, too, can use Amazon to grow your business.
Recently, Amazon launched Amazon Home Services to allow Amazon customers to source any type of professional services—like bike mechanics, carpet cleaners, pet groomers, and plumbers—through the Amazon.com portal.
Below are the types of professionals currently listing their services on Amazon, but this list is growing regularly.

If you’re a B2C service professional, here’s what you need to know to start selling your services on Amazon.
6 Steps to Selling Services on Amazon
Think of Amazon Home Services (which we’ll call AHS) as an Uber for B2C services: Through AHS, Amazon customers can easily source a variety of services by connecting to those service providers in their neighborhoods. Check out the Amazon Home Services Storefront to see how customers navigate services, and to determine what other service providers are currently participating in your neighborhood.
Curious about becoming an Amazon Service Provider? Follow these six steps to apply to the program, set up your account, and start connecting with prospective clients in your area.
1. Apply for Amazon Home Services
Before you can to register your professional services on AHS, you’ll need to complete an application. To be eligible for this program, you’ll need to suit Amazon’s basic requirements, which include holding General Liability insurance and providing the appropriate licensing for your trade.
Then, Amazon will complete a business background check to make sure your company’s information is copacetic. Any employees participating in in-home services will need to pass individual background checks, too.
If your application is accepted, you’ll receive an email from Amazon with an activation code and instructions for setting up your Amazon Home Service profile.
2. Set Up Your Amazon Home Services Profile
Once you’ve been accepted as an Amazon Service Provider, you’ll be able to create your storefront, which is the profile page where customers can learn more about your company. You can write an introduction to your business, specify your service area by zip code, collect customer reviews, and more.
3. Create Your Packages
Amazon has created set pre-packages for various service categories based on the most common service requests they see from customers (most of which are product assembly and installation).
Once you’ve signed up as a seller, you can choose which of these services to offer, set your prices, and specify the exact zip codes in which you’ll operate. Customers can order these packages on Amazon.com at any time. You’ll receive an email notification when your new order is queued up.
4. Use Seller Central
Through the Amazon Seller Central portal, you can schedule services online, set up automated communications with customers, manage your packages, prices, and payments, and much more.
5. Create Custom Services
Occasionally, a customer in your neighborhood may be interested in a service that’s in your wheelhouse, but doesn’t exactly fit within one of your pre-packaged options. In that case, Amazon offers custom service requests.
When a client makes a custom service request, you’ll receive their request via email and have 24 hours to respond with a bid. If the customer accepts the bid, you’ll proceed with the order as usual, and Amazon will handle all scheduling, billing, and payment processing.
6. Receive Payment
Amazon Payments automatically handles payment for services sold through Amazon Home Services, so you don’t have to deal with invoicing or collecting from your customers. Once you’ve completed a job, Amazon simply deposits your earnings directly into your bank account. Also be aware that Amazon collects a percentage of your service price, which they’ll deduct from your bank account every time they pay you.
Amazon Home Services Fees
One of the greatest benefits of selling services on Amazon is that you don’t pay up front for leads or advertising. Fees are calculated as a percentage of sales, so Amazon only gets paid when you do.
For any service that Amazon sells on your behalf, the company will collect the following fees:
- Transaction Fee: 5% of each transaction—includes the costs of invoicing, payment processing, and fraud protection.
- Platform Fee: between 10% and 20% of each transaction—covers marketing and advertising costs, seller tools, and customer service.
The total cost of Amazon Home Services fees depends on the price of your service, and the type of service you’re providing:
- Pre-Packaged Services: Amazon collects 20% for the portion of the service price up to $1,000 (5% Transaction fee and 15% Service Platform fee), and 15% for the portion of the service price greater than $1,000 (5% Transaction fee and 10% Service Platform fee).
- Custom Services: Fees for Custom Services amount to 15% for the portion of the service price up to $1,000 (5% Transaction fee and 10% Service Platform fee), and 10% for the portion of the service price greater than $1,000 (5% Transaction fee and 5% Service Platform fee).
- Recurring Services: If a customer books your company for a recurring service (such as weekly fitness training sessions or monthly carpet cleaning services), Amazon collects 10% of service price for completed orders over $1,000 (5% Transaction fee and 5% Service Platform fee).
As you can see, Amazon collects all transaction and platform fees as a percentage of the service price, rather than a flat rate. That percentage excludes any taxes collected through Amazon tax collection services.

How to Sell on Amazon: The Most Important Things to Remember
Whether you’re selling products or services, Amazon’s brand recognition and logistical advantages are incredible tools for expanding your business far beyond what you’d likely have the capacity to achieve on your own.
Setting up your small business on Amazon will take some time and attention. And the costs associated with selling on Amazon do take a notch out of your profit margins. But when you start to see your sales increase after working with this ecommerce giant, you’ll thank yourself for that extra input.
The post How to Sell on Amazon: The Ultimate Guide for New Amazon Sellers appeared first on Fundera Ledger.
from Fundera Ledger https://www.fundera.com/blog/selling-on-amazon/
No comments:
Post a Comment