Let’s dive into the best way to accept credit cards and process the info if you’re using QuickBooks Online.
You’ve got your QuickBooks Online subscription set up, you’re selling stuff, creating invoices … you’re well on your way to taking over the world, one sale at a time.
The next step—and trust me, this step will be one that you’ll define as life changing—is to set up your QuickBooks Credit Card Payments account. By doing this, you’re making it easy for your customers or clients to pay you, as well as reducing work on your time recording them.
I’m going to show you just how easy it is to set up your QuickBooks Credit Card Payments account and the magic that will follow. So let’s dig right in.
Setting Up QuickBooks Credit Card Payments
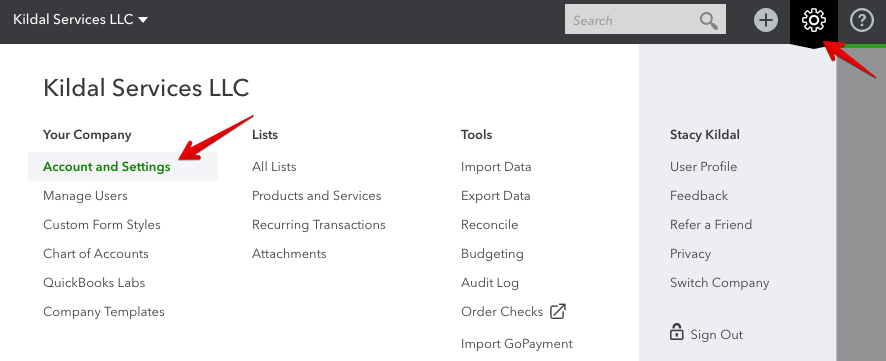
To create a new QuickBooks Credit Card Payments account, click the gear icon in the top right corner, and then choose “Account and Settings”:
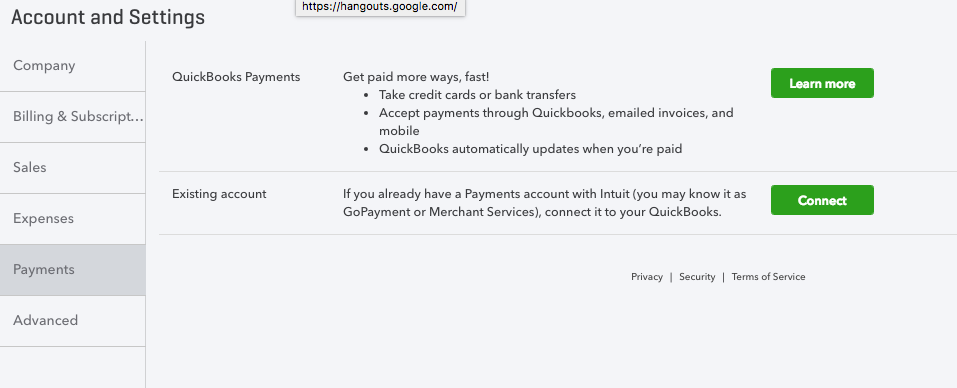
From there, click the “Payments” tab on the left navigation bar:
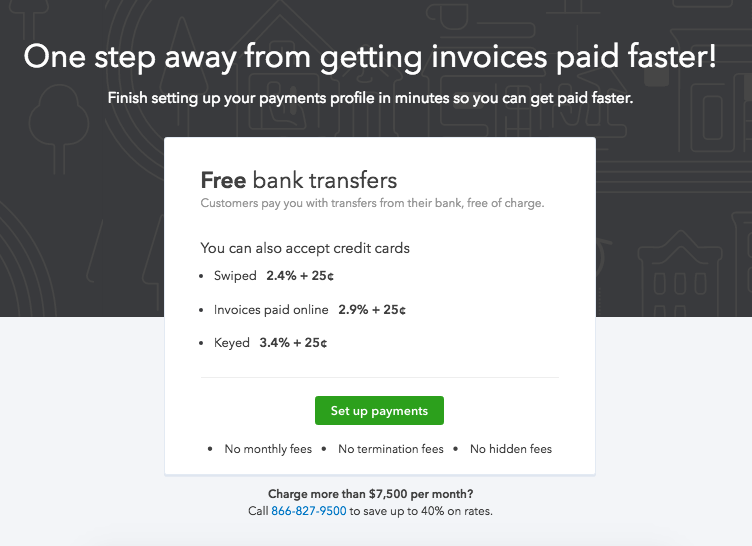
Then you’ll see details about rates (note: if your customers choose bank transfers, your QuickBooks Credit Card Payments fee is nothing.)
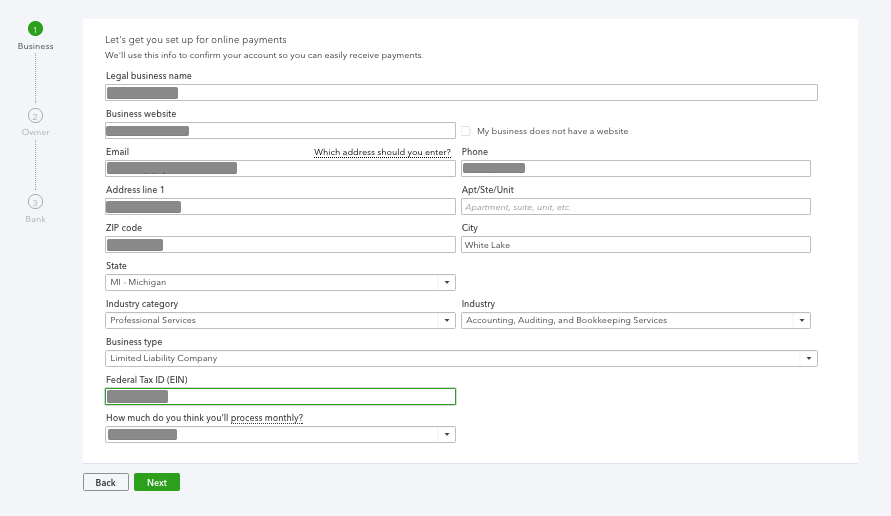
Now, enter the information about your business:
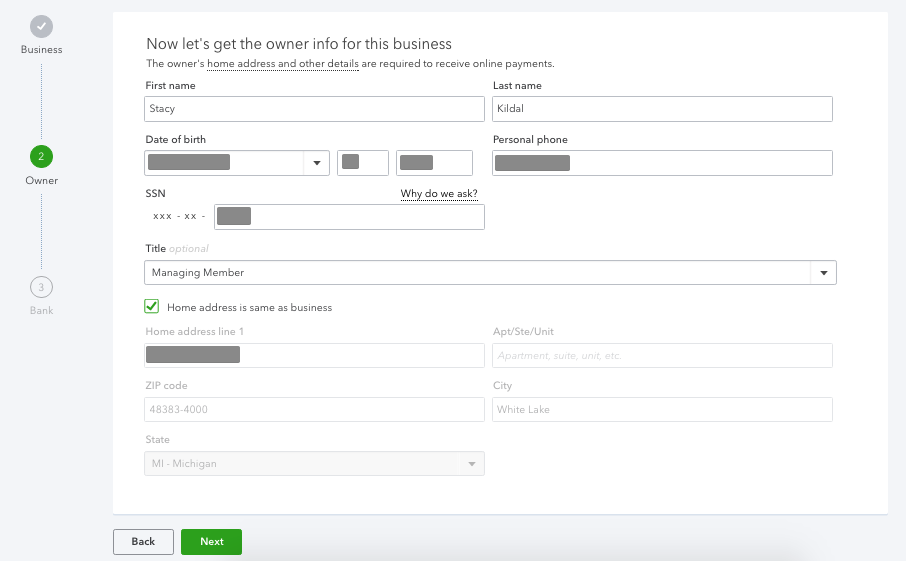
And the owner/principal of your business:
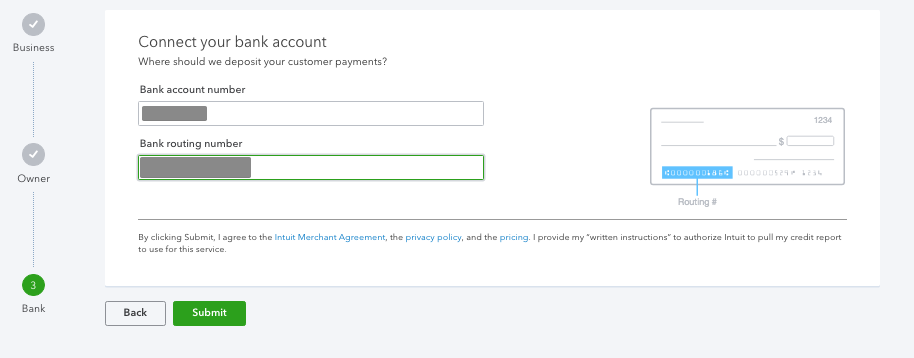
Last, enter your business bank information:
You’ll be notified quickly if you are approved, and QuickBooks Credit Card Payments will be available to use within about 24 hours.
If you’re not approved, you can call support to inquire about the reasons. Please be aware that it may not necessarily be credit related; it could be that your business is an industry that isn’t on their approved list (i.e., medical marijuana).
Managing Your QuickBooks Credit Card Payments Account
Once your account is approved, you can verify the connection and make changes to how transactions are handled by going back to the gear icon, choosing Account and Settings, and again clicking the Payments tab.
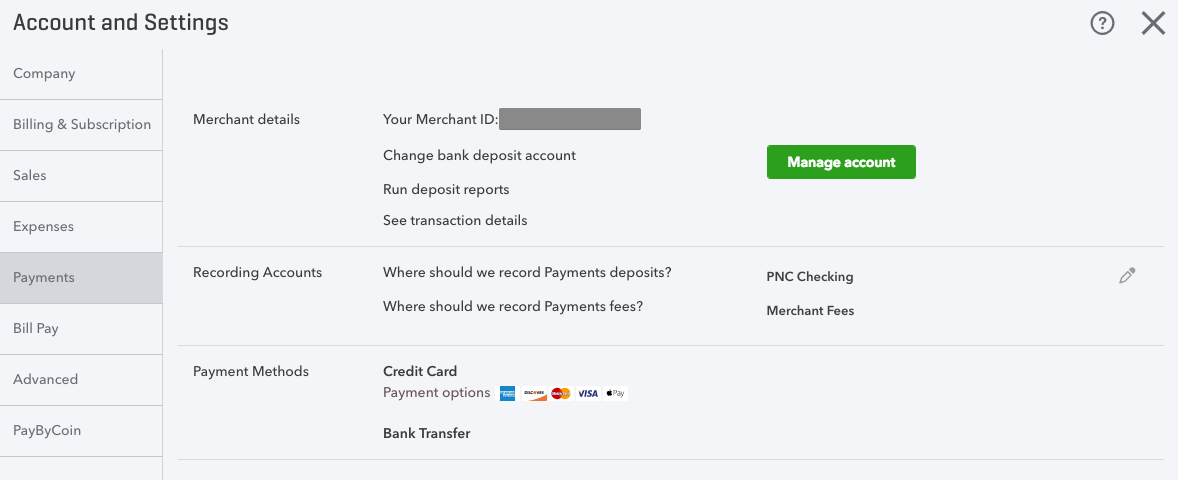
You can then choose the bank account in your QuickBooks Online chart of accounts that you’d like to have deposits post, as well the expense account for merchant fees.

If you need to see a history of transactions or change your QuickBooks Credit Card Payments settings, you can click the “Manage Account” button.
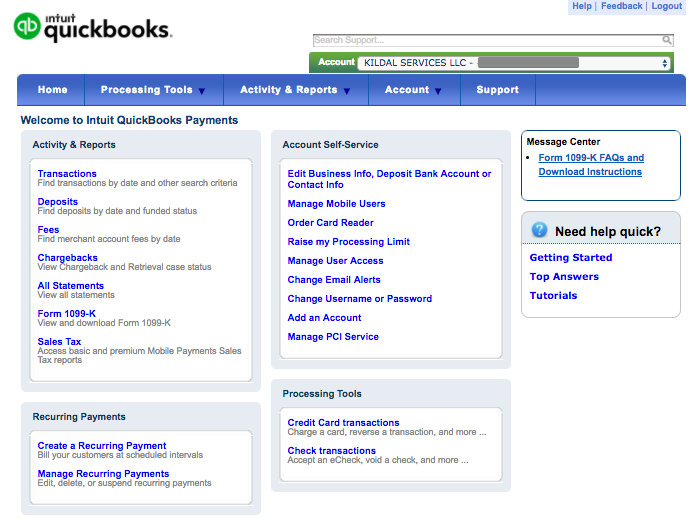
Clicking that button will open a new page (merchantcenter.intuit.com). From here, you can review all of the QuickBooks Credit Card Payments transaction history, manage mobile-only users, set alert preferences, access help and resources, and change the bank account, if needed.
Creating Transactions
Now that your QuickBooks Credit Card Payments are all set and ready to go, you can start creating transactions—and getting paid!
Let’s take a look at sending invoices—both what happens on your end, as well as your customers’.
Before we do that, set a preference to make sure your customers will view the invoice via the Online Invoice portal. To do this, click that gear icon, go to Account and Settings and then choose the Sales tab.
Here, we want to click on the section titled “Online delivery” and make sure that the check box next to “Attach invoice as PDF” is not checked. We don’t want to attach the invoice because we want to get the recipient to view it in the invoice portal, where they have the option to pay.

Now we’re ready to send an invoice. The easiest way to create an invoice is to click on the Quick Create button in the top right corner and choose Invoices.
(Quick Create is that spinny plus. I made a GIF for you…)
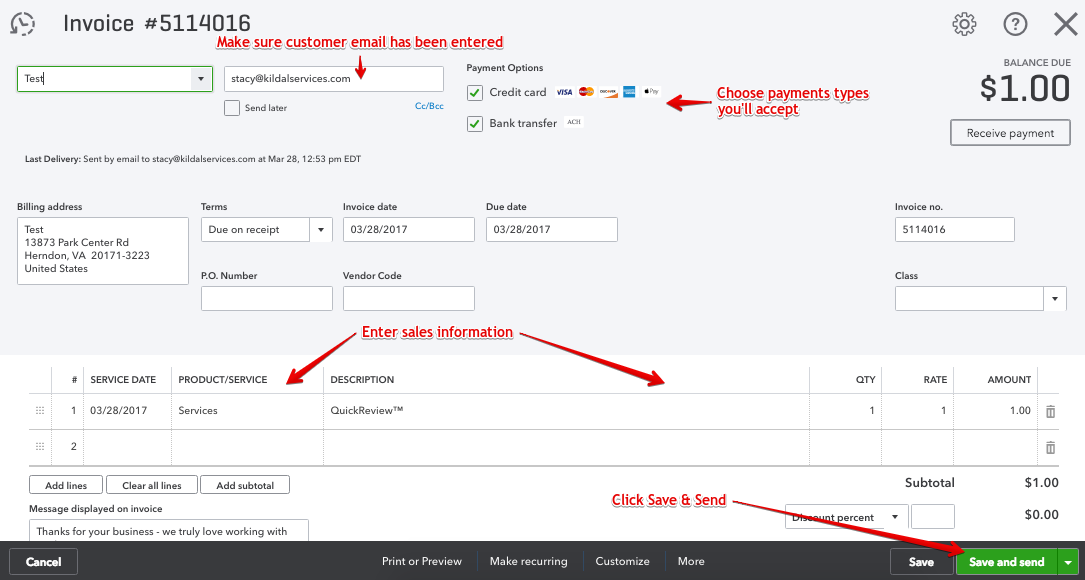
Once you get the invoice form open, just fill it out as you normally would—make sure you select which types of online payment options you’ll accept—and then click “Save and send” in the bottom right corner.
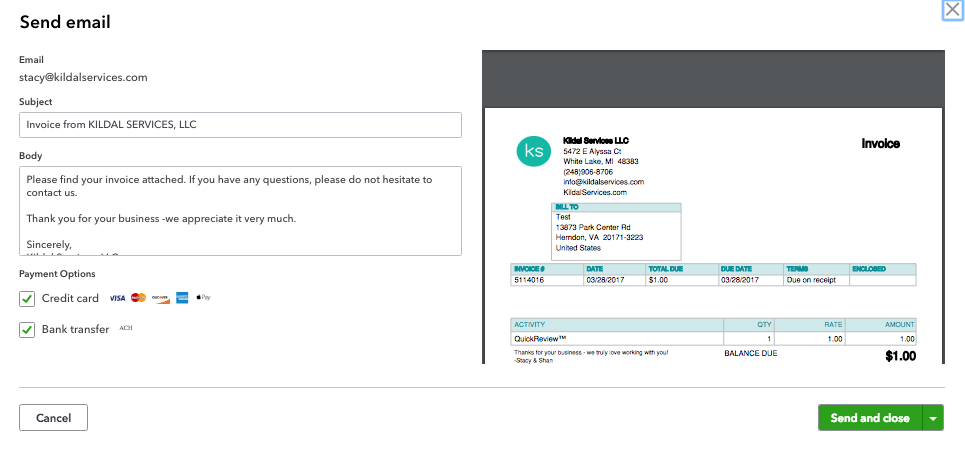
The next screen lets you make any changes to the subject line and body of the email before you send it. You can also change your mind about the payment options or add them, in case you forgot when you created the invoice.
When everything looks good, hit the “Send and close” button.
As long as your customer pays online, you’re done. I’ll show you what I mean below.
Isn’t this fun??
Customer Online Invoice Portal
After you send that invoice, your customer will get an email (without the invoice attached as a PDF) that includes a button they’ll click to view their invoice. As long as they don’t delete this email, they’ll be able to go back and view the invoice any time they choose.
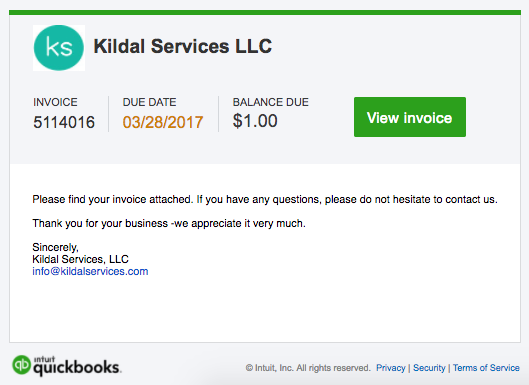
Once they click the “View Invoice,” they’ll be taken to the Online Invoice Portal, and this is where the magic of QuickBooks Credit Card Payments really happens. From the Online Invoice Portal, the customer can print, save the invoice as a PDF, and pay it.
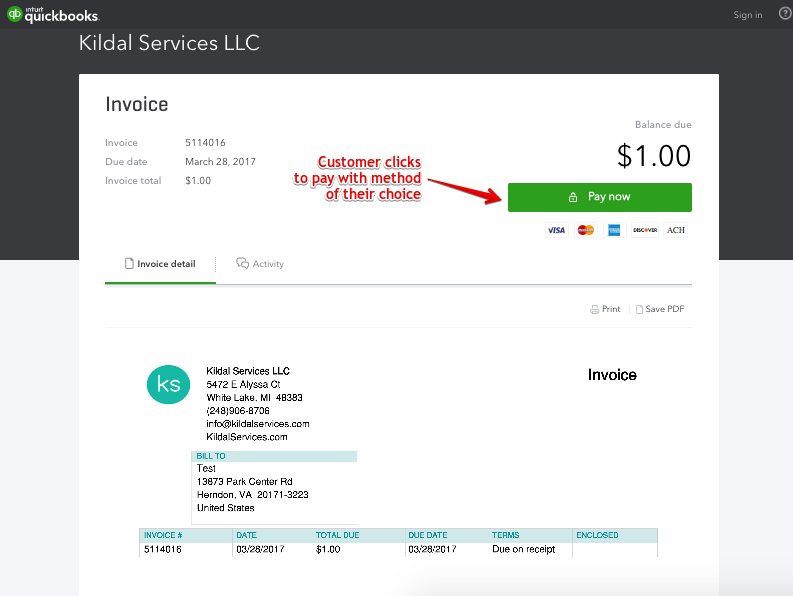
Once they click the “Pay Now” button, the customer chooses the payment method and enters the information. They also have the option of creating an account to save their payment info to use the next time they receive an invoice from a QuickBooks Online user.
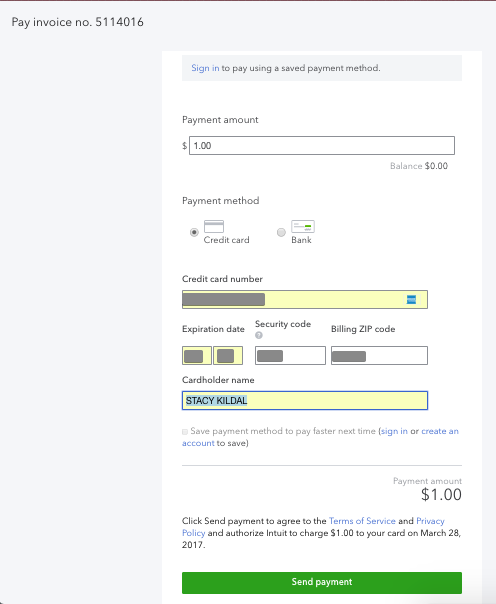
You can see in the screenshot below, the customer has chosen to use a credit card to pay. Once they’ve chose the amount to pay (it can be less than or equal to the balance due on the invoice but not over), they’ll be asked to enter the name on the card, card number, expiration date, CVV code, and billing ZIP code.
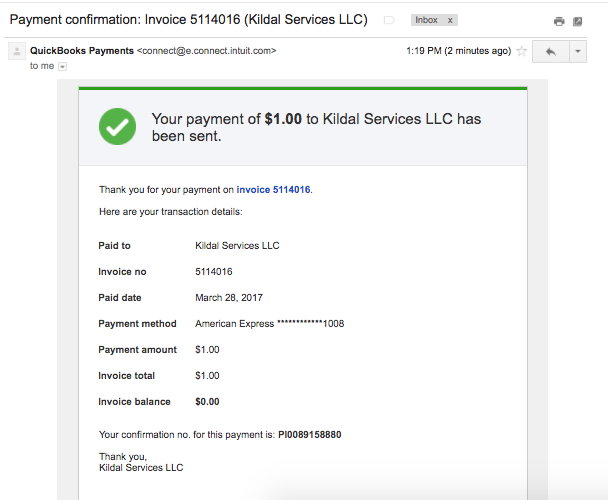
After they click the “Send payment” button, they’ll see a confirmation on their screen, and the Online Invoice Portal will show a paid status.
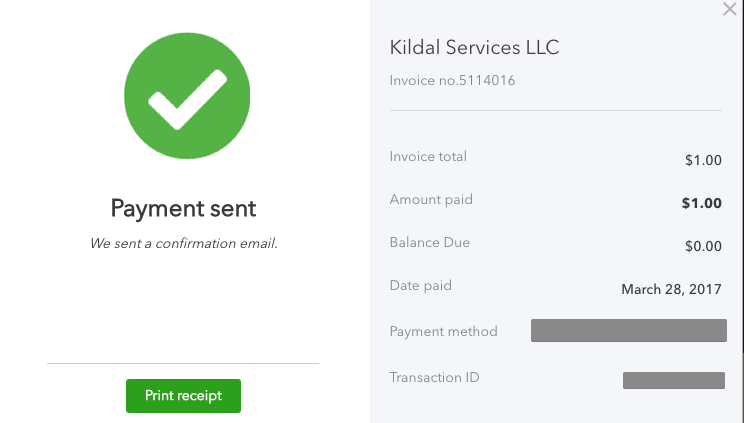
They’ll also receive an email with the payment confirmation, which includes a link to the invoice in the Online Invoice Portal.
QuickBooks Online Marked as Paid
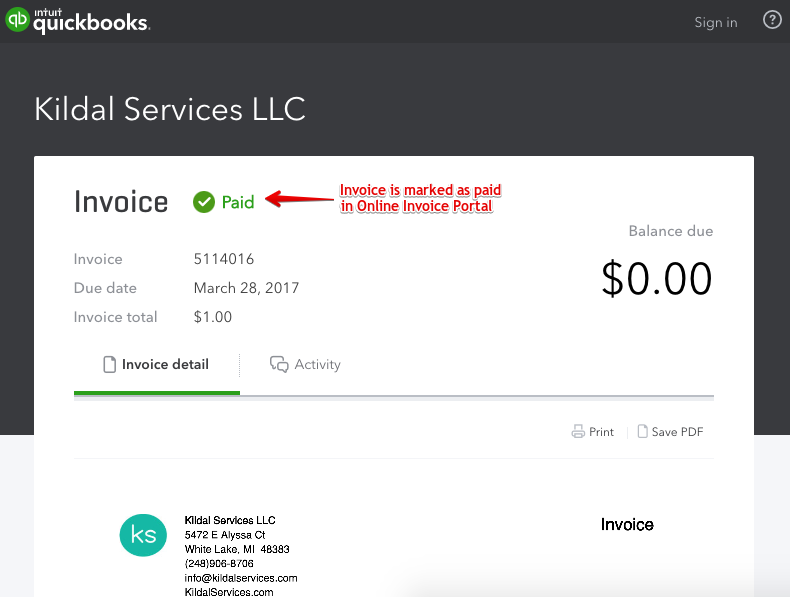
Earlier, I told that you that once the invoice is sent, if you’re using QuickBooks Credit Card Payments, your job is done. QuickBooks Online does all the rest of the work for you.
After your customer pays, you’ll also receive an email notifying you that you’ve been paid, and when you open the invoice in QuickBooks Online, you’ll see it now has a paid status, with a link to the payment in QBO.
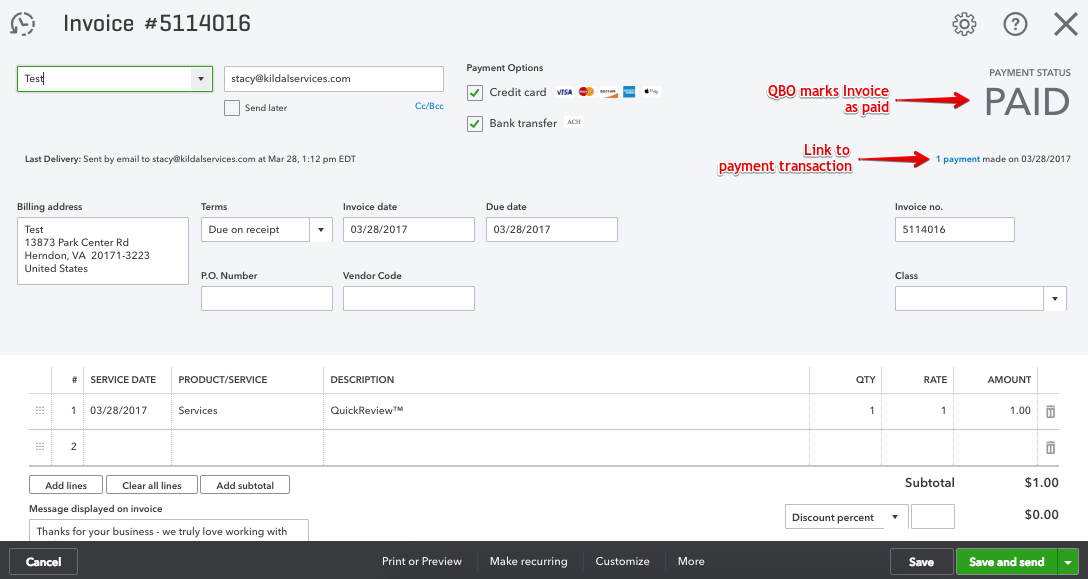
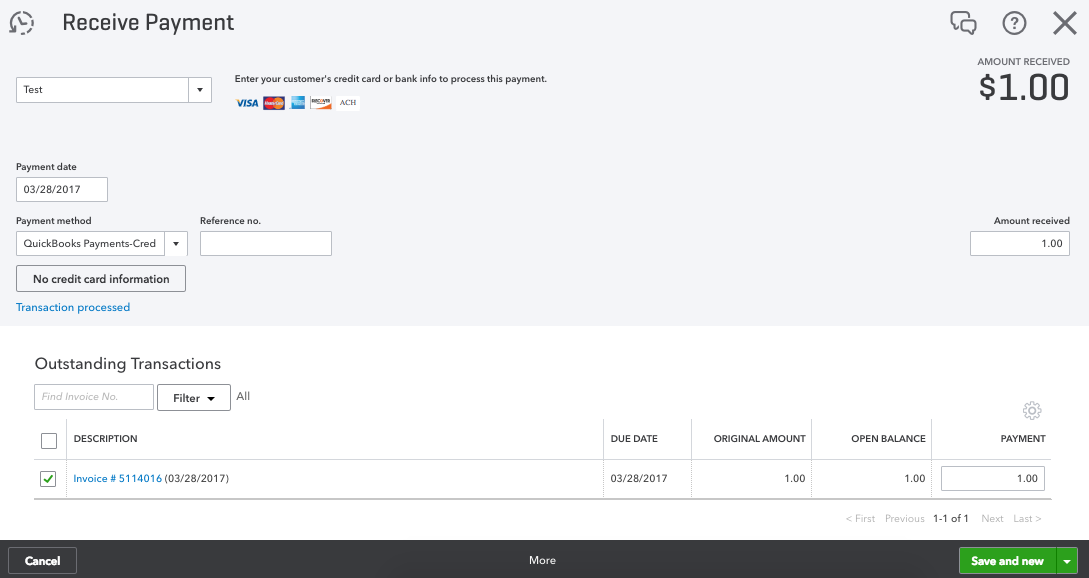
When you click the link from the invoice, you’ll see the receive payment screen; this will show you the date, amount, and that the transaction has been processed via QuickBooks Credit Card Payments.
Once the deposit hits your bank, QuickBooks Credit Card Payments enters the deposit for you.
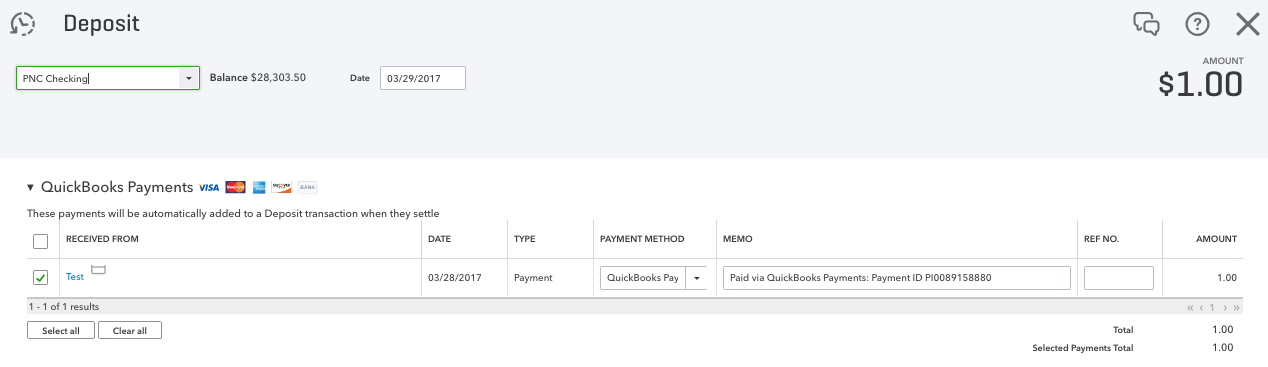
In the screenshot below, you can see the audit history for the deposit, showing that QuickBooks Credit Card Payments worked its magic and posted the deposit for you.
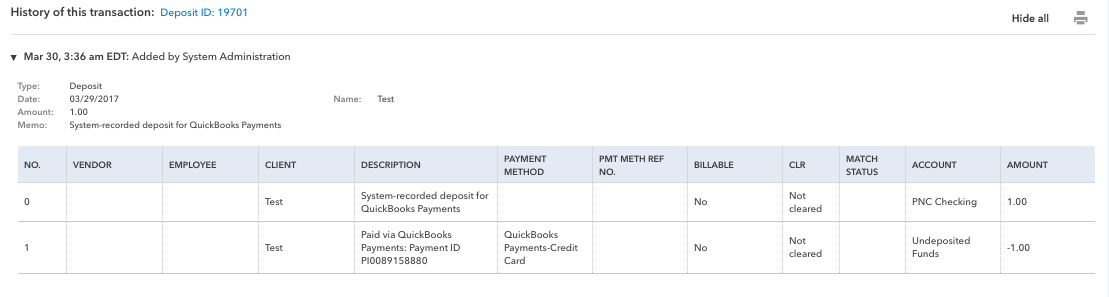
Even better, if the customer pays with a credit card, QuickBooks Credit Card Payments also magically enters the transaction for the merchant fee!

Storing Payment Information in QuickBooks Online
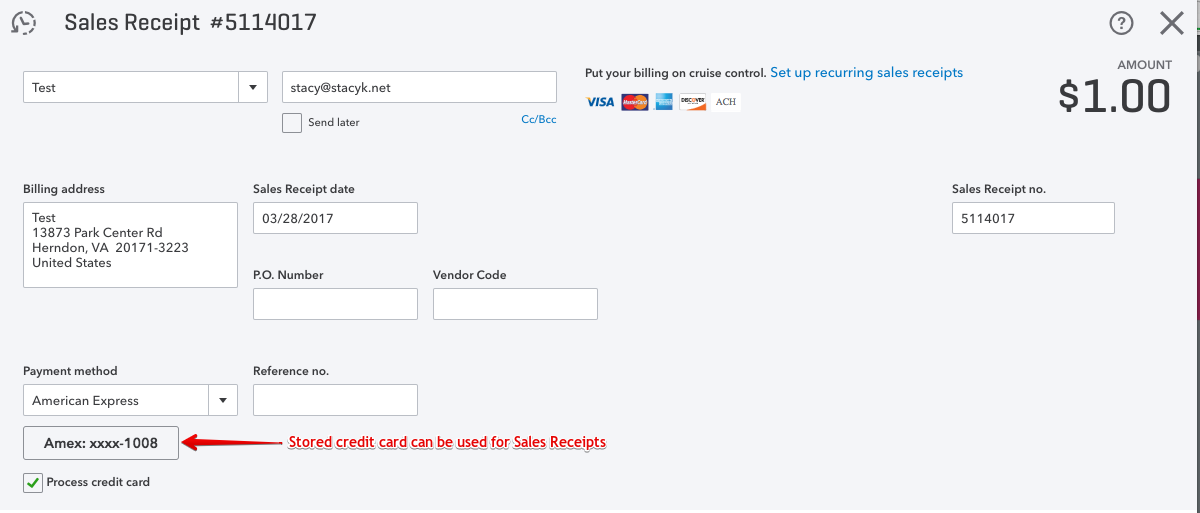
In addition to creating invoices and sending them to customers, you can have your customers complete a payment authorization form and store their bank or credit card information. QuickBooks Online and QuickBooks Credit Card Payments are PCI compliant, and once you enter the payment details, all but the last four digits are masked.
The screenshot below shows an American Express card, but you can store Visa, MasterCard, Discover, or bank routing/account numbers, depending on the client’s preference. You cannot store more than one card or account.

To create a sales receipt, just click the Quick Create button (scroll up a bit and check out that sweet GIF again, if you want), then choose Sales Receipt. Complete the form as you normally would, and choose the type of payment method you’ve just added.
The best part, in my opinion, about using QuickBooks Credit Card Payments is that if you have recurring sales (we use these for all of our bookkeeping clients at Kildal Services), you can choose to turn a sales receipt into a recurring transaction. This means that QBO will automatically create a new sales receipt at whatever interval you set.
And if you have the payment information stored, it also charges the card or drafts the bank and emails the customer and you a copy, all at the same magical time.
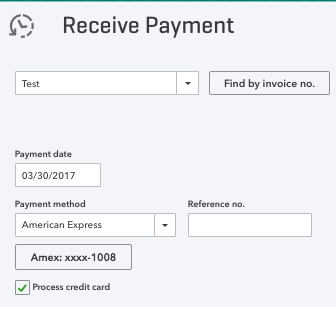
If you’re not doing recurring sales, you can still store the card. So whenever the customer is ready, they can let you know that it’s OK to receive a payment using the payment method on file. In this case, you’d click on your Quick Create, choose Receive Payment, and enter the appropriate information.
Just a couple of notes to wrap up: When you’ve got your QuickBooks Credit Card Payments account setup, you can also use it on your mobile device to receive payments and create sales receipts.
For users you want to set up to receive payments but not have access to your QuickBooks Online account, put them in the merchant center as a mobile user. They can then download the GoPayment app and start accepting payments.
You might be thinking, What about the fees? Consider this last thing: I was a die hard, dig-in-my-heels, I’m-not-paying-for-that merchant service hater…. But once I started accepting credit cards, it wasn’t long before I realized that it really is life changing. The time I had spent chasing money was almost twice what I was spending in merchant fees!
Good luck, and enjoy all of that free time you’ll have, now that you’re using QuickBooks Credit Card Payments!
The post The Bookkeeper’s Guide to QuickBooks Credit Card Payments appeared first on Fundera Ledger.
from Fundera Ledger https://www.fundera.com/blog/quickbooks-credit-card-payments
No comments:
Post a Comment